

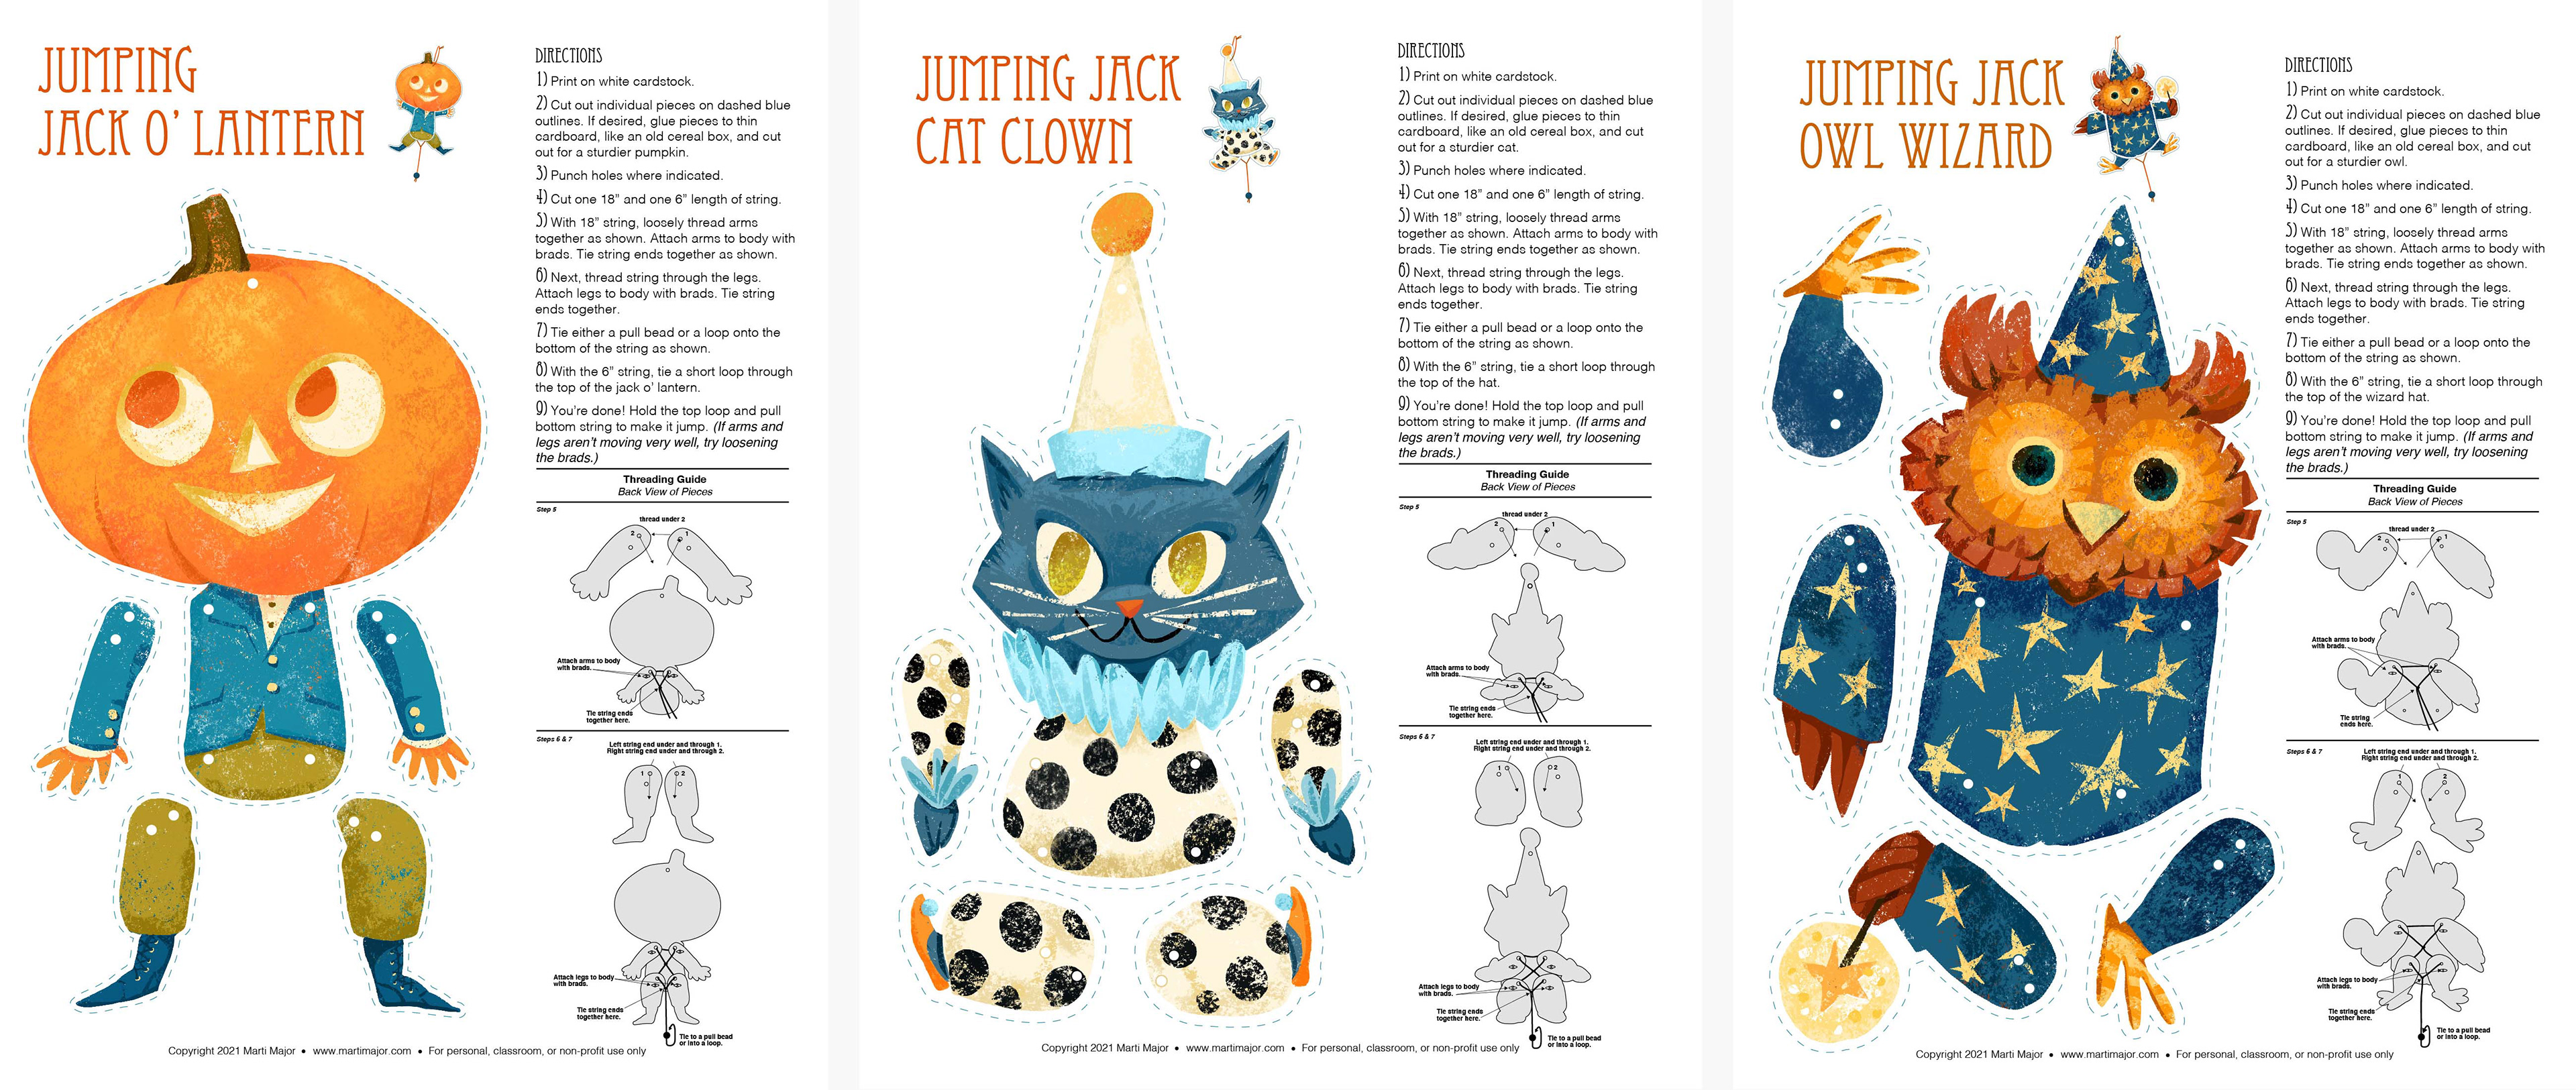
Printable Halloween Jumping Jacks! Free for all personal and non-commercial use.
Click the button below to download. Right click the images to save. Each is a 8.5x11", high-resolution, .jpg image with assembly instructions. A step-by-step tutorial with photos is below.
Materials required: scissors, 4 brads/paper fasteners per jumping jack, hole punch, string. Optional: empty cereal box or lightweight cardboard, glue, and bead for the pull string.
Enjoy!
Step 1: Print each jumping jack onto white cardstock. Regular printer paper will work but not terribly great. I tested regular copy paper, cardstock, and cardstock glued to an old cereal box, and the cardstock/cardstock with cereal box were far superior. The weight makes a big difference to how well these work.
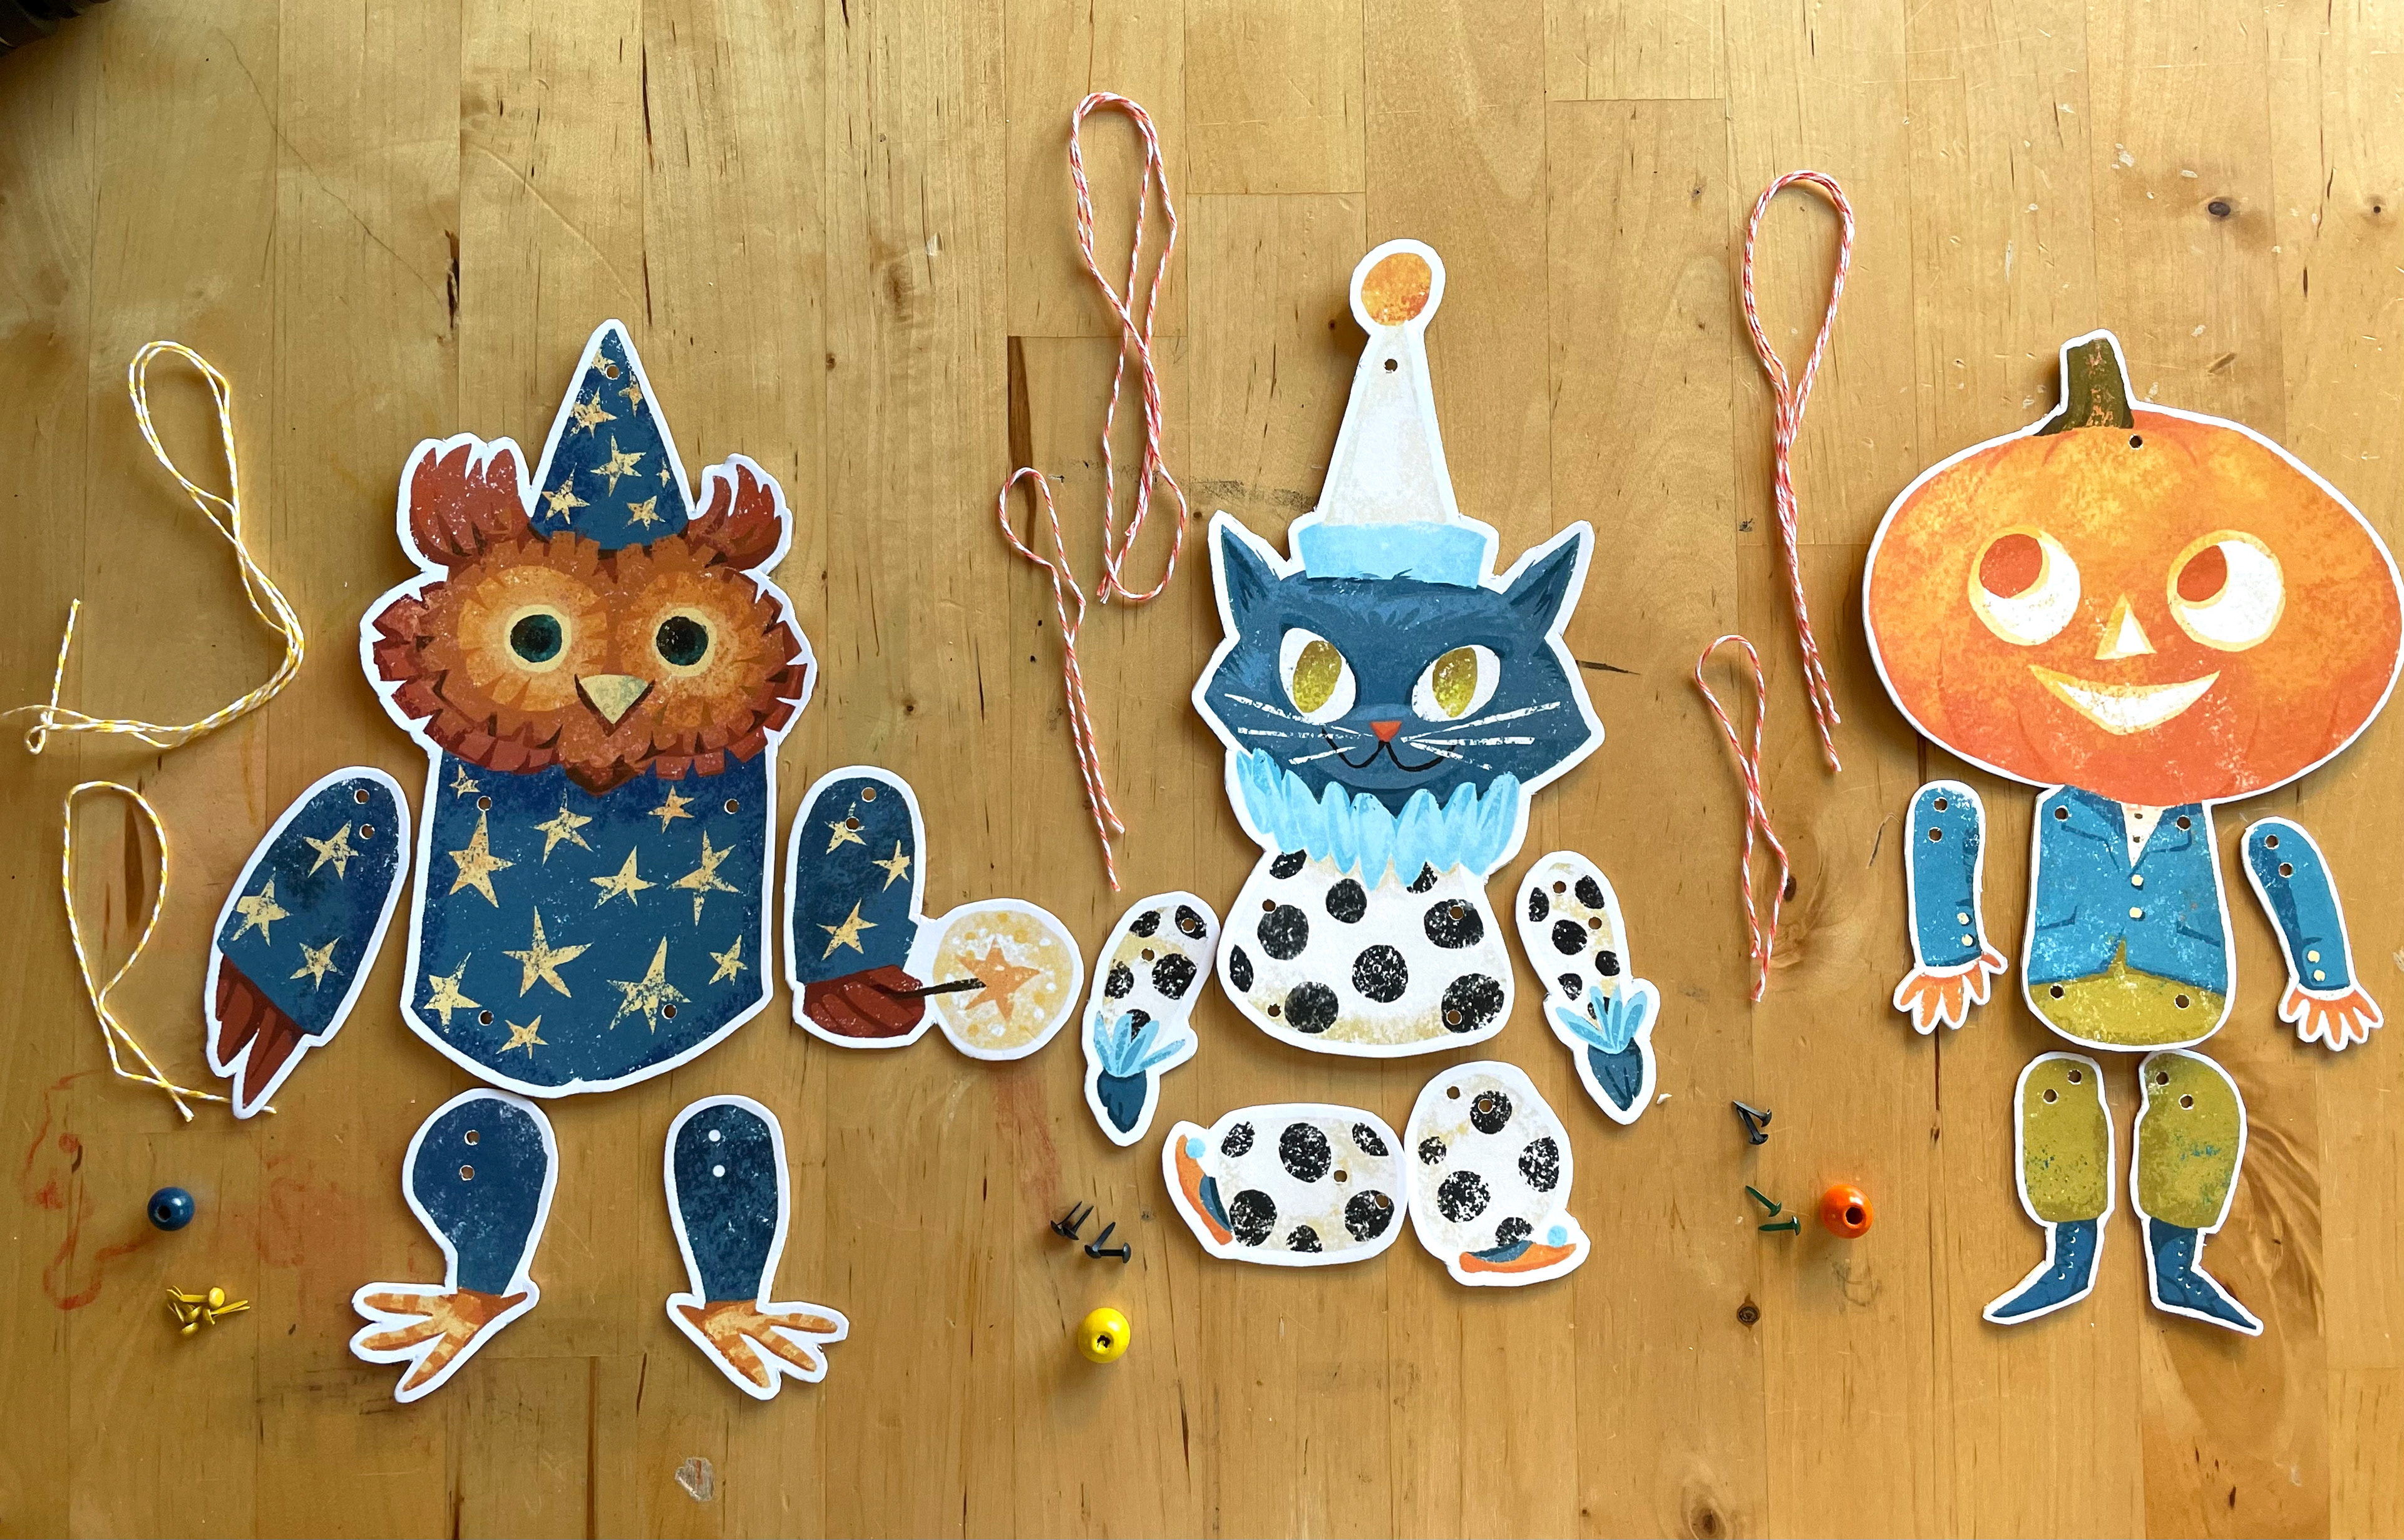
Step 2: Cut out individual pieces on the dashed blue outlines. Glue pieces to an old cereal box or lightweight cardboard for sturdier jumping jacks. If you're not using cardboard backing, skip to step 3.
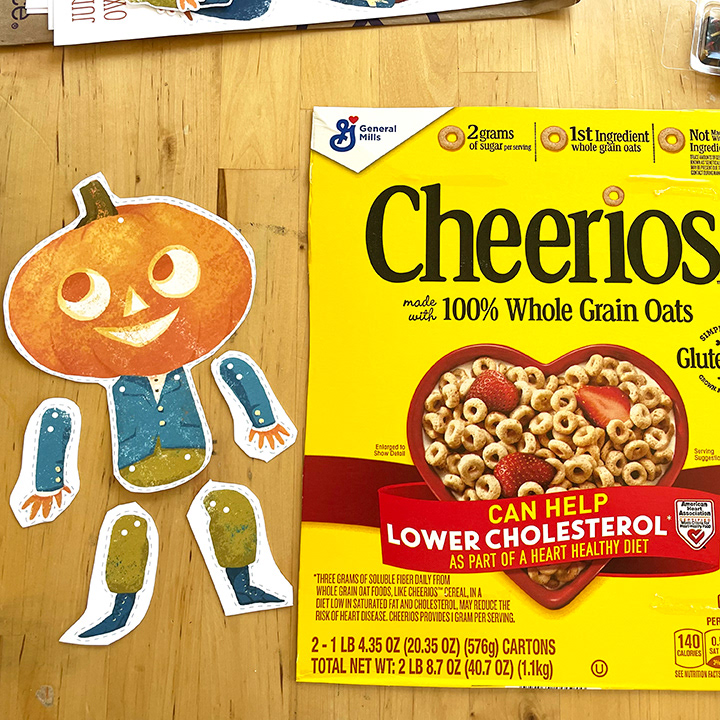
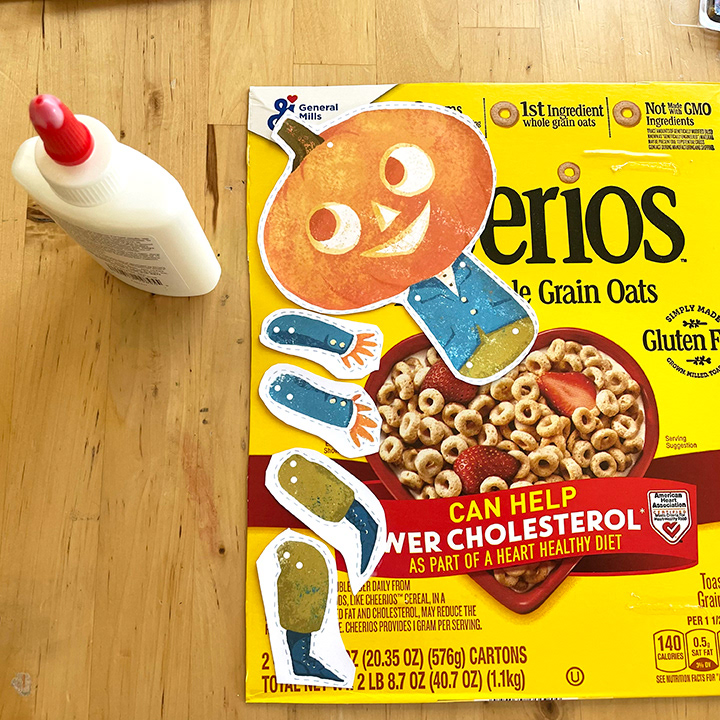

If you're using a cereal box, rough cut, then glue all of the pieces to the printed side of the box. Gluing them to the printed side of the box means the backs of the finished pieces are cardboard color, and not loud cereal advertising. It can take a while for them to dry because of the thickness of the cardstock and the thickness of the cardboard. Check that all of the pieces are laying flat as they dry since the cardstock had a tendency to warp some.
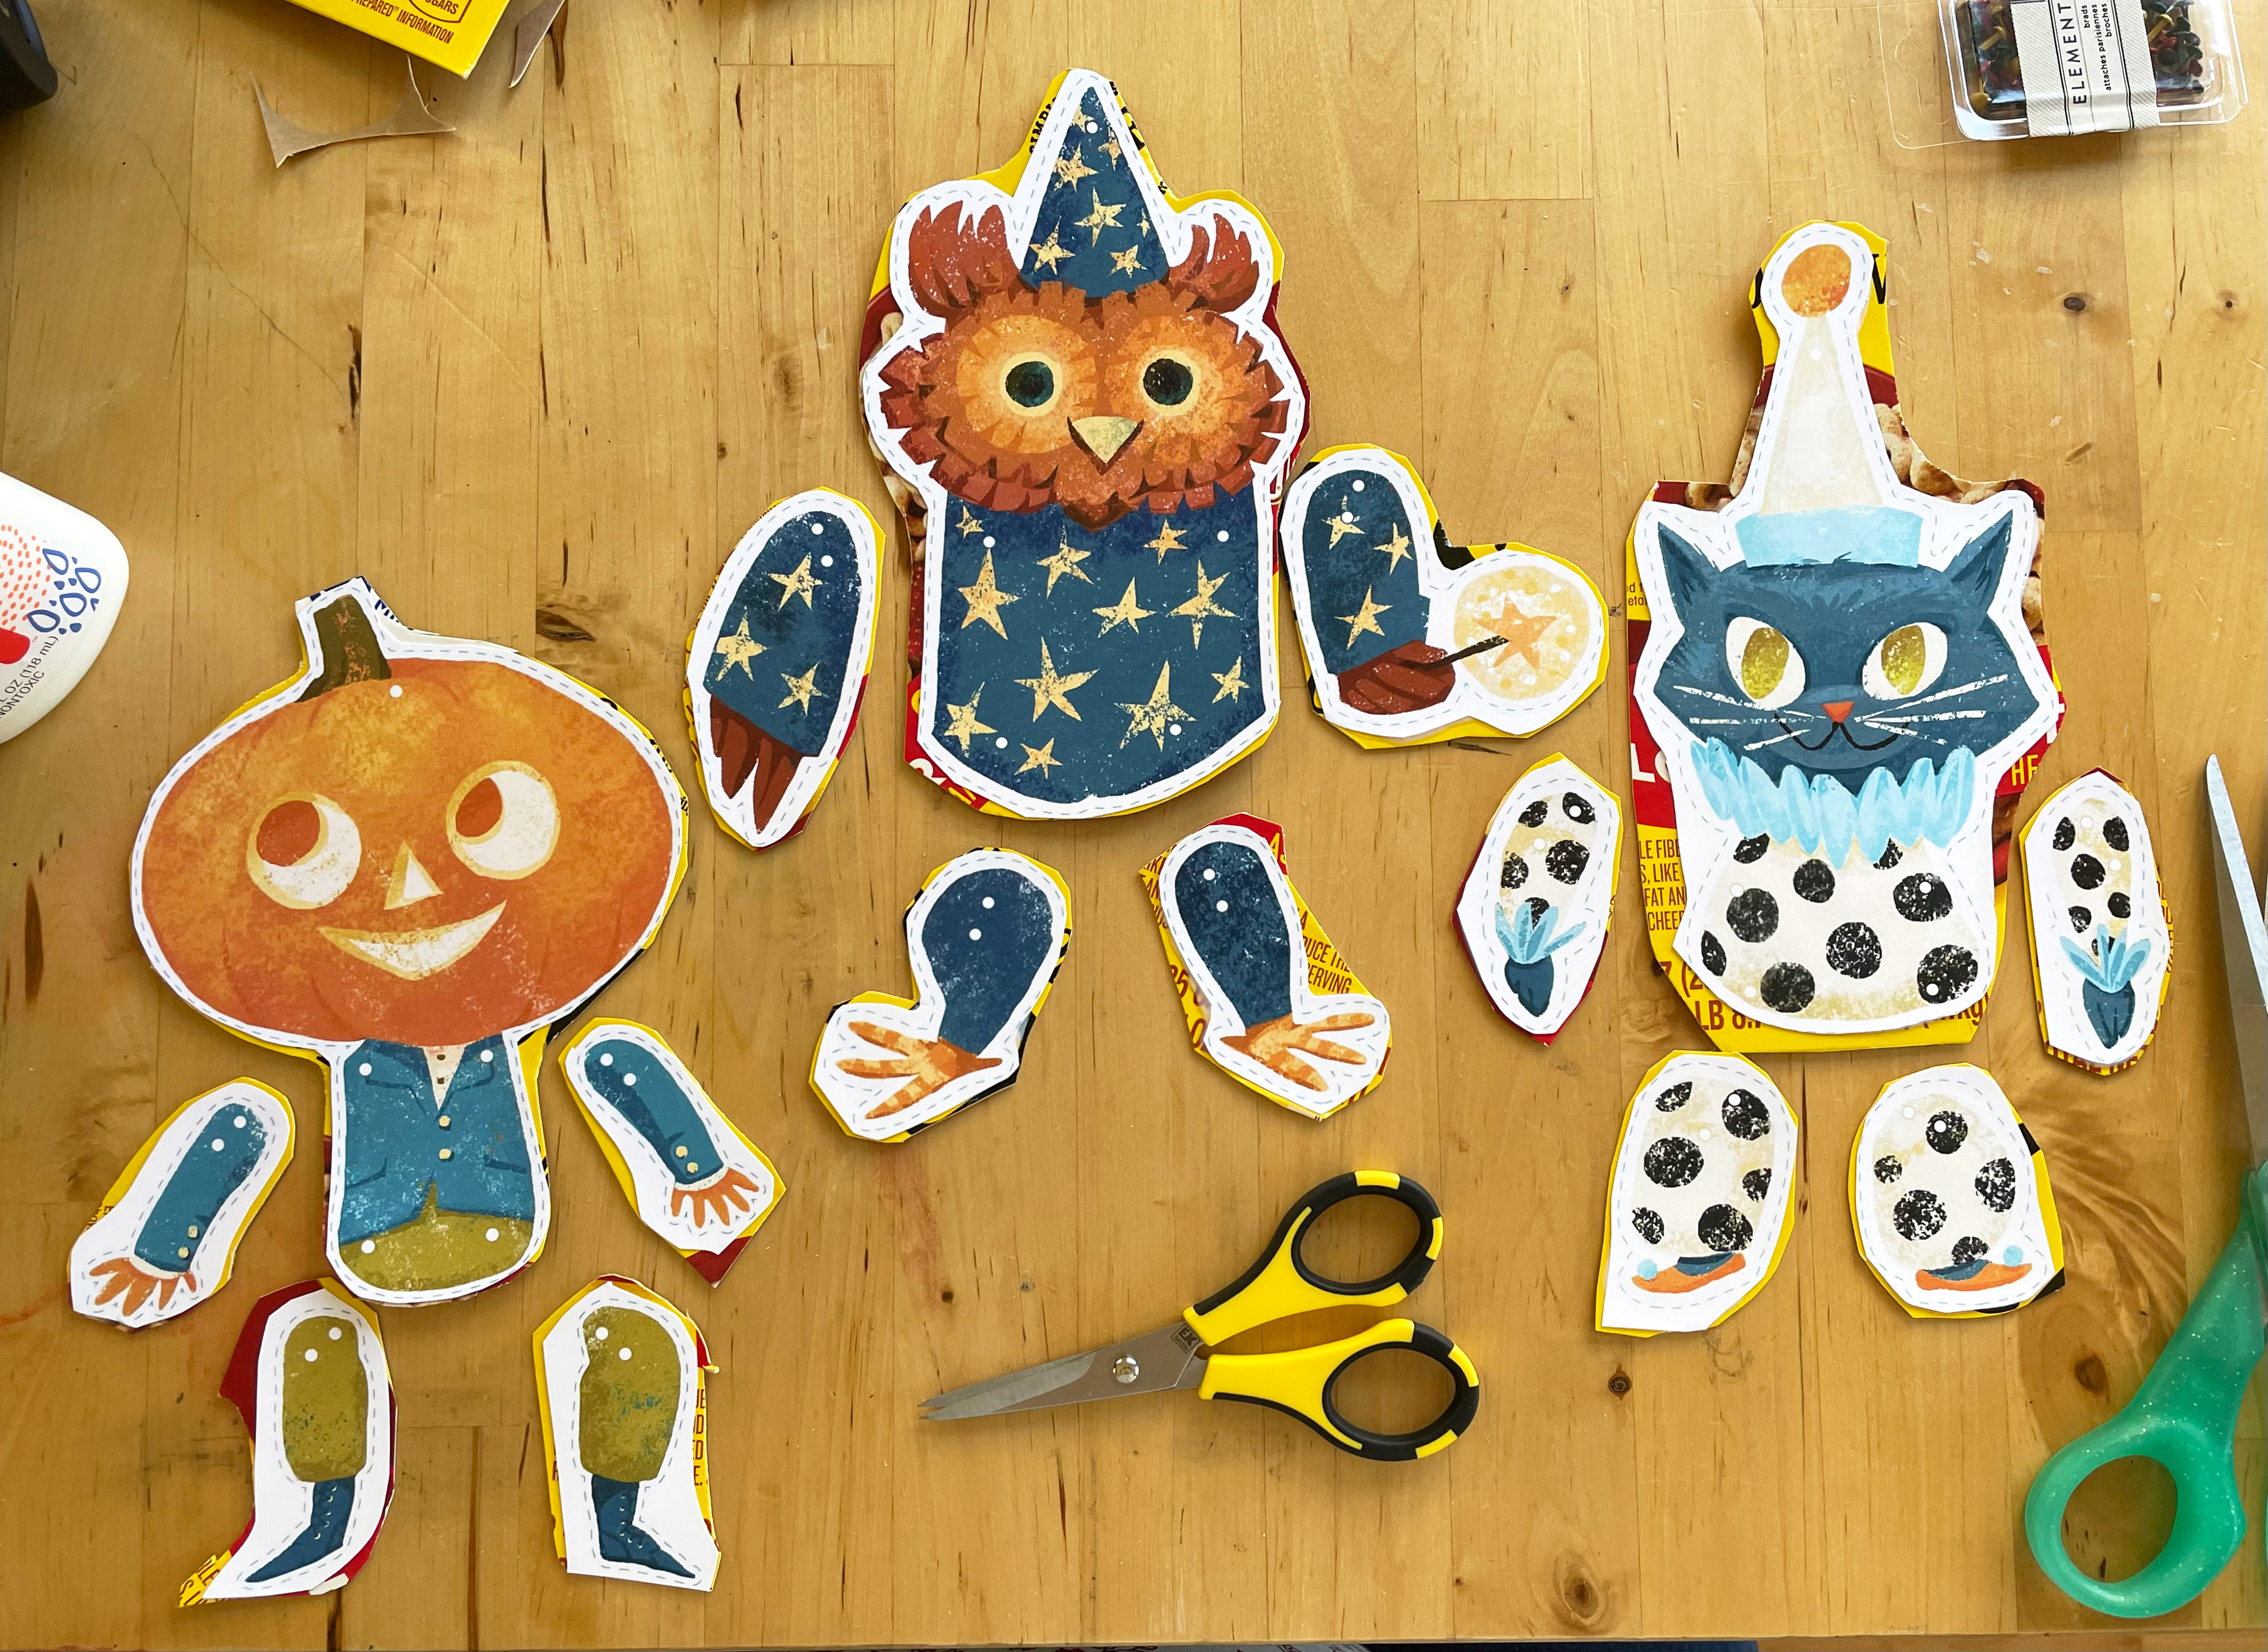
Once dry enough, cut out the individual pieces. (I used regular scissors to cut along the blue outline, and then used the smaller, sharper scissors for the details the larger scissors couldn't manage.)
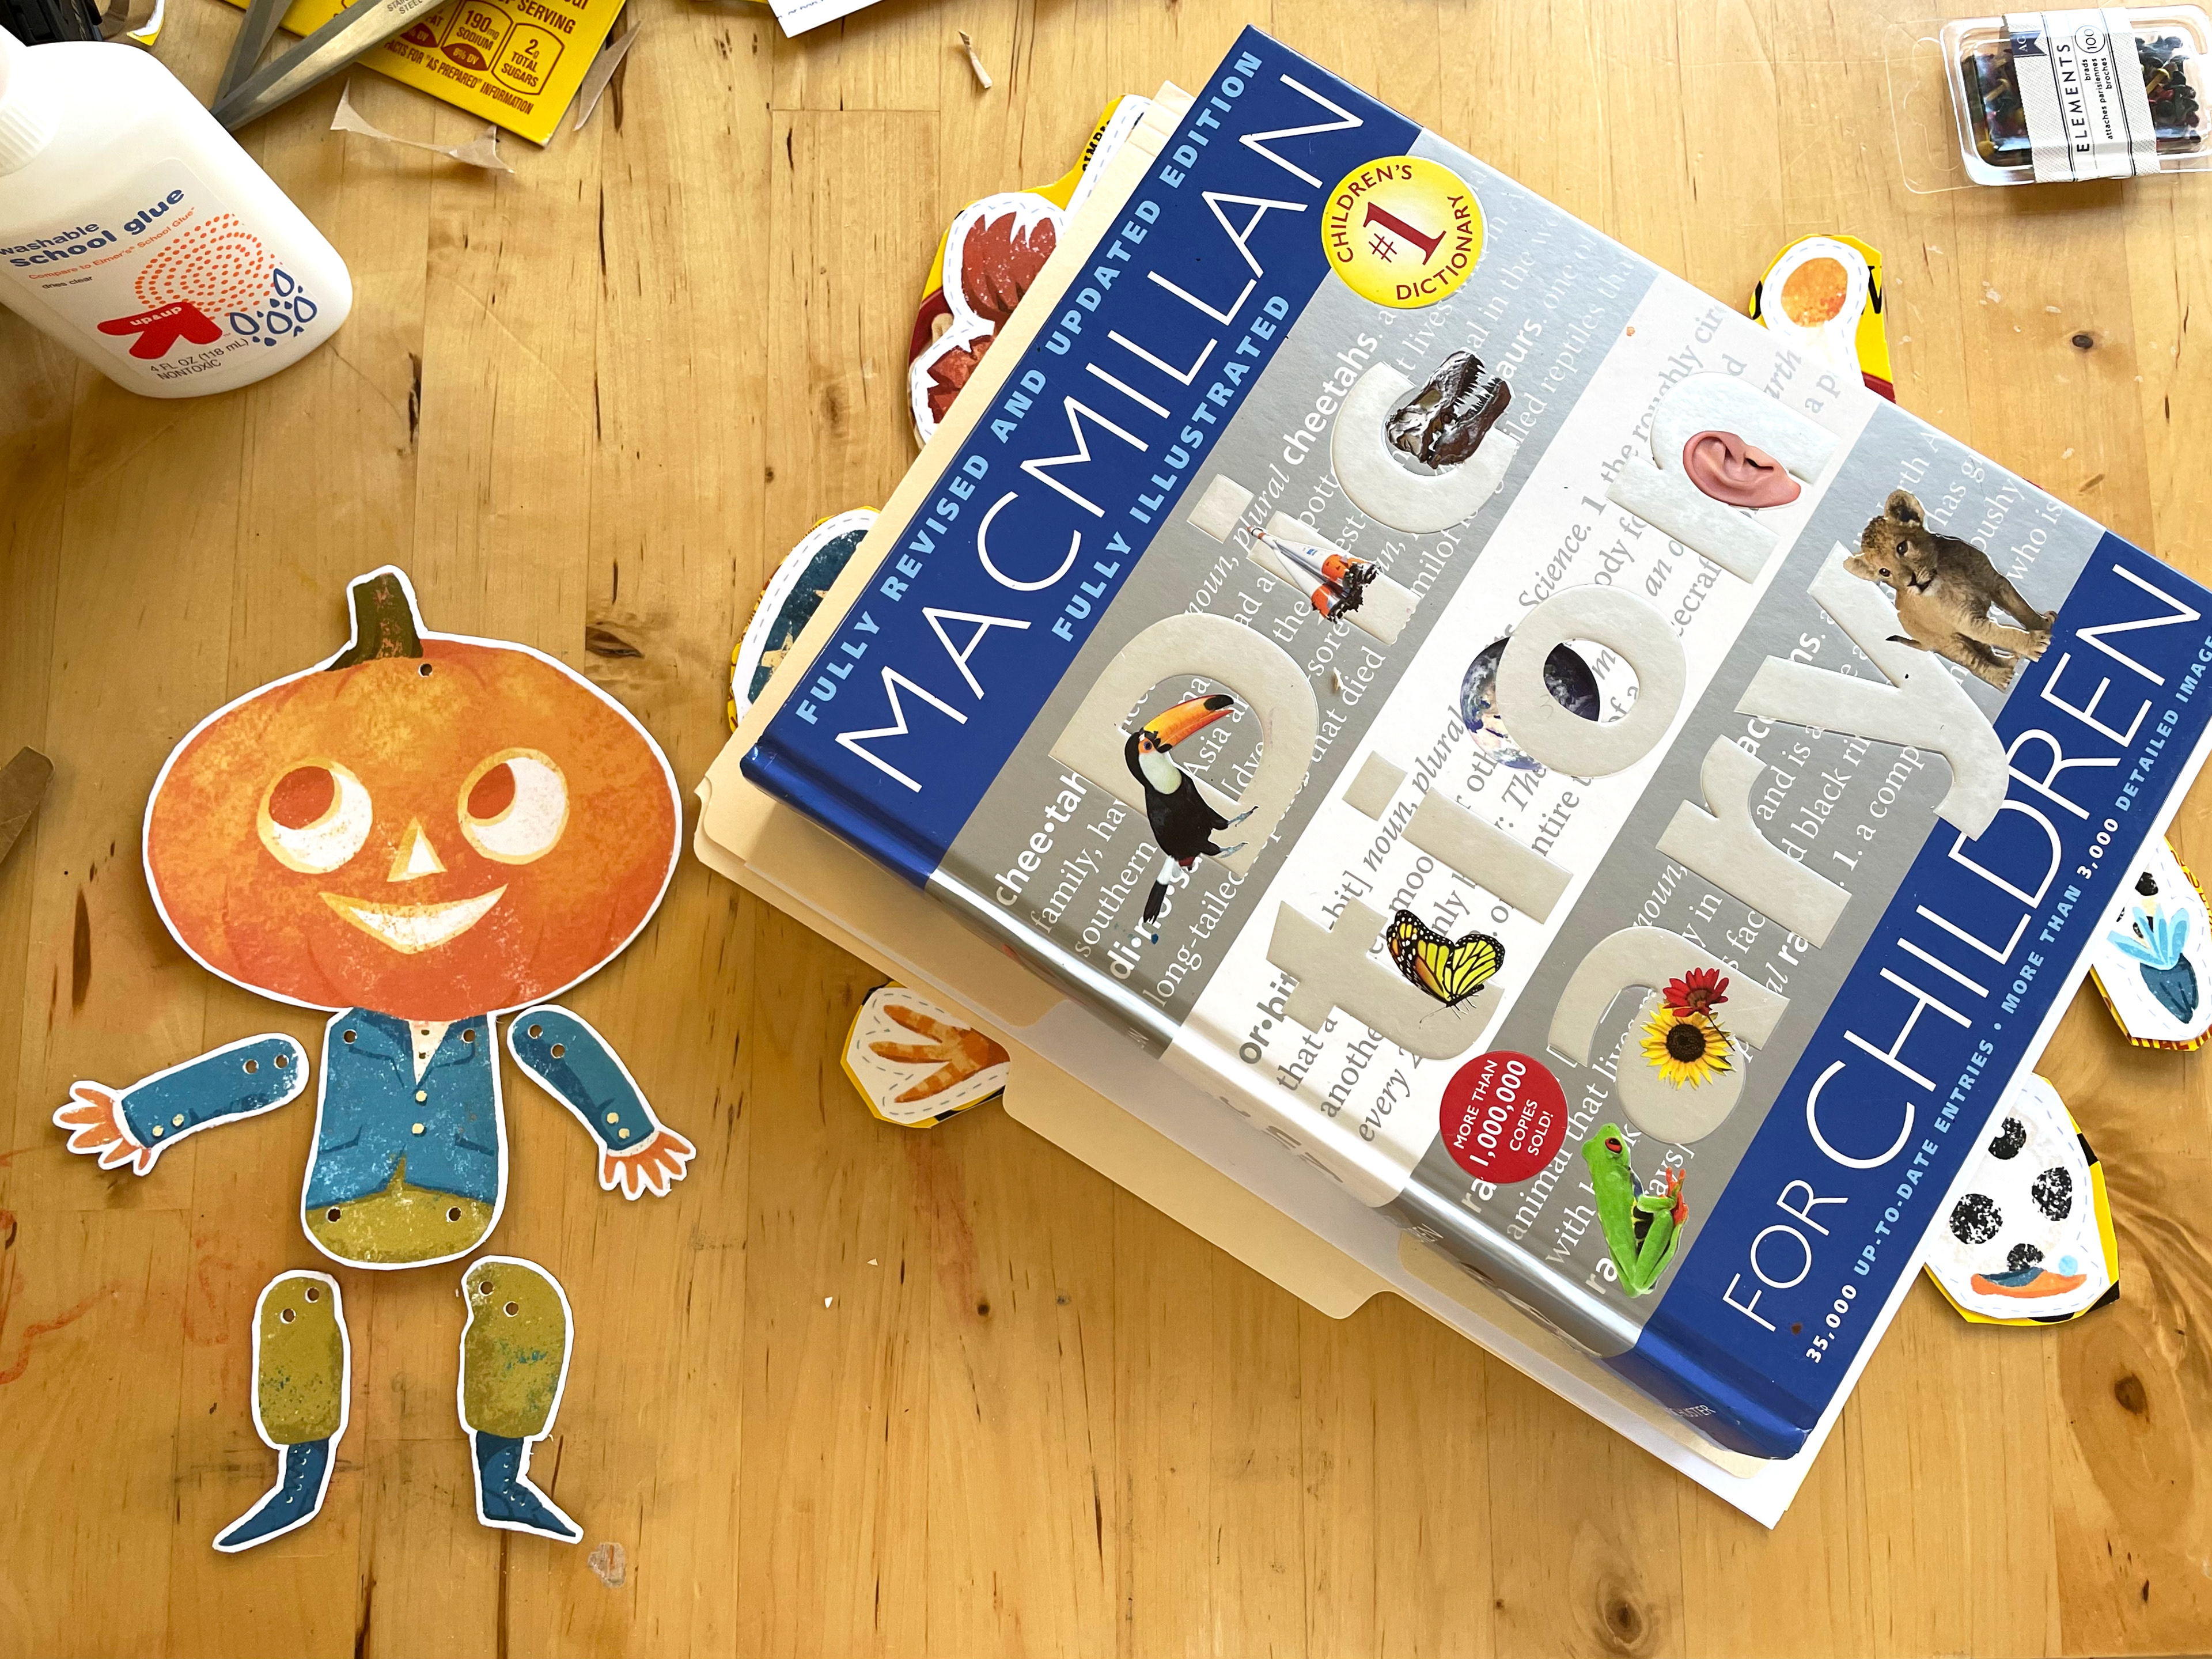
Here you see the classical crafting method of smooshing the pieces flat with a children's dictionary. They were still drying and were curling up. The dictionary did the trick.
Steps 3 & 4: Punch holes where indicated (small white circles). Cut one 18" string and one 6" string. There's no need to precisely measure the strings, you just want them long enough to do the job. The longer string will be for threading the back, and the shorter for the loop at the top. Have the brads for attaching the arms and legs to the body ready.
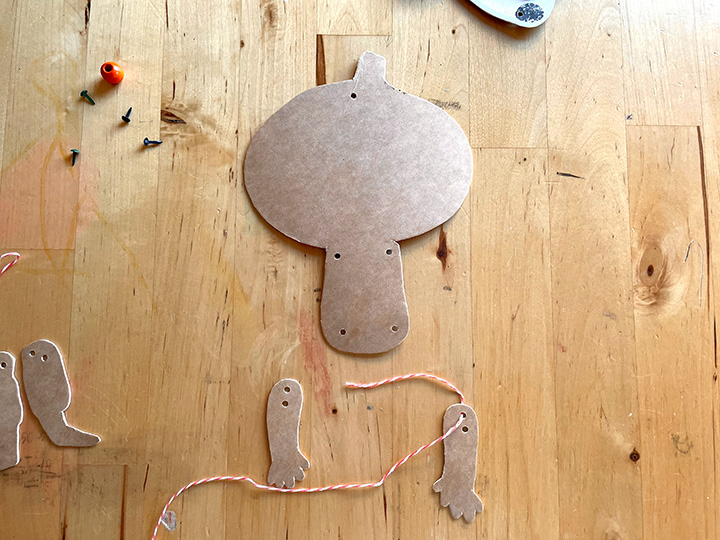
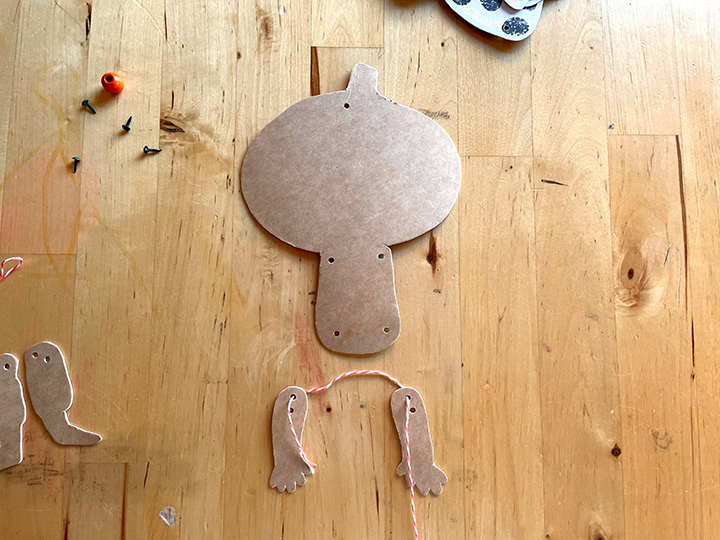
Step 5: With the 18" string, loosely thread the arms together as shown. Pull the string through so that it's even on both sides.
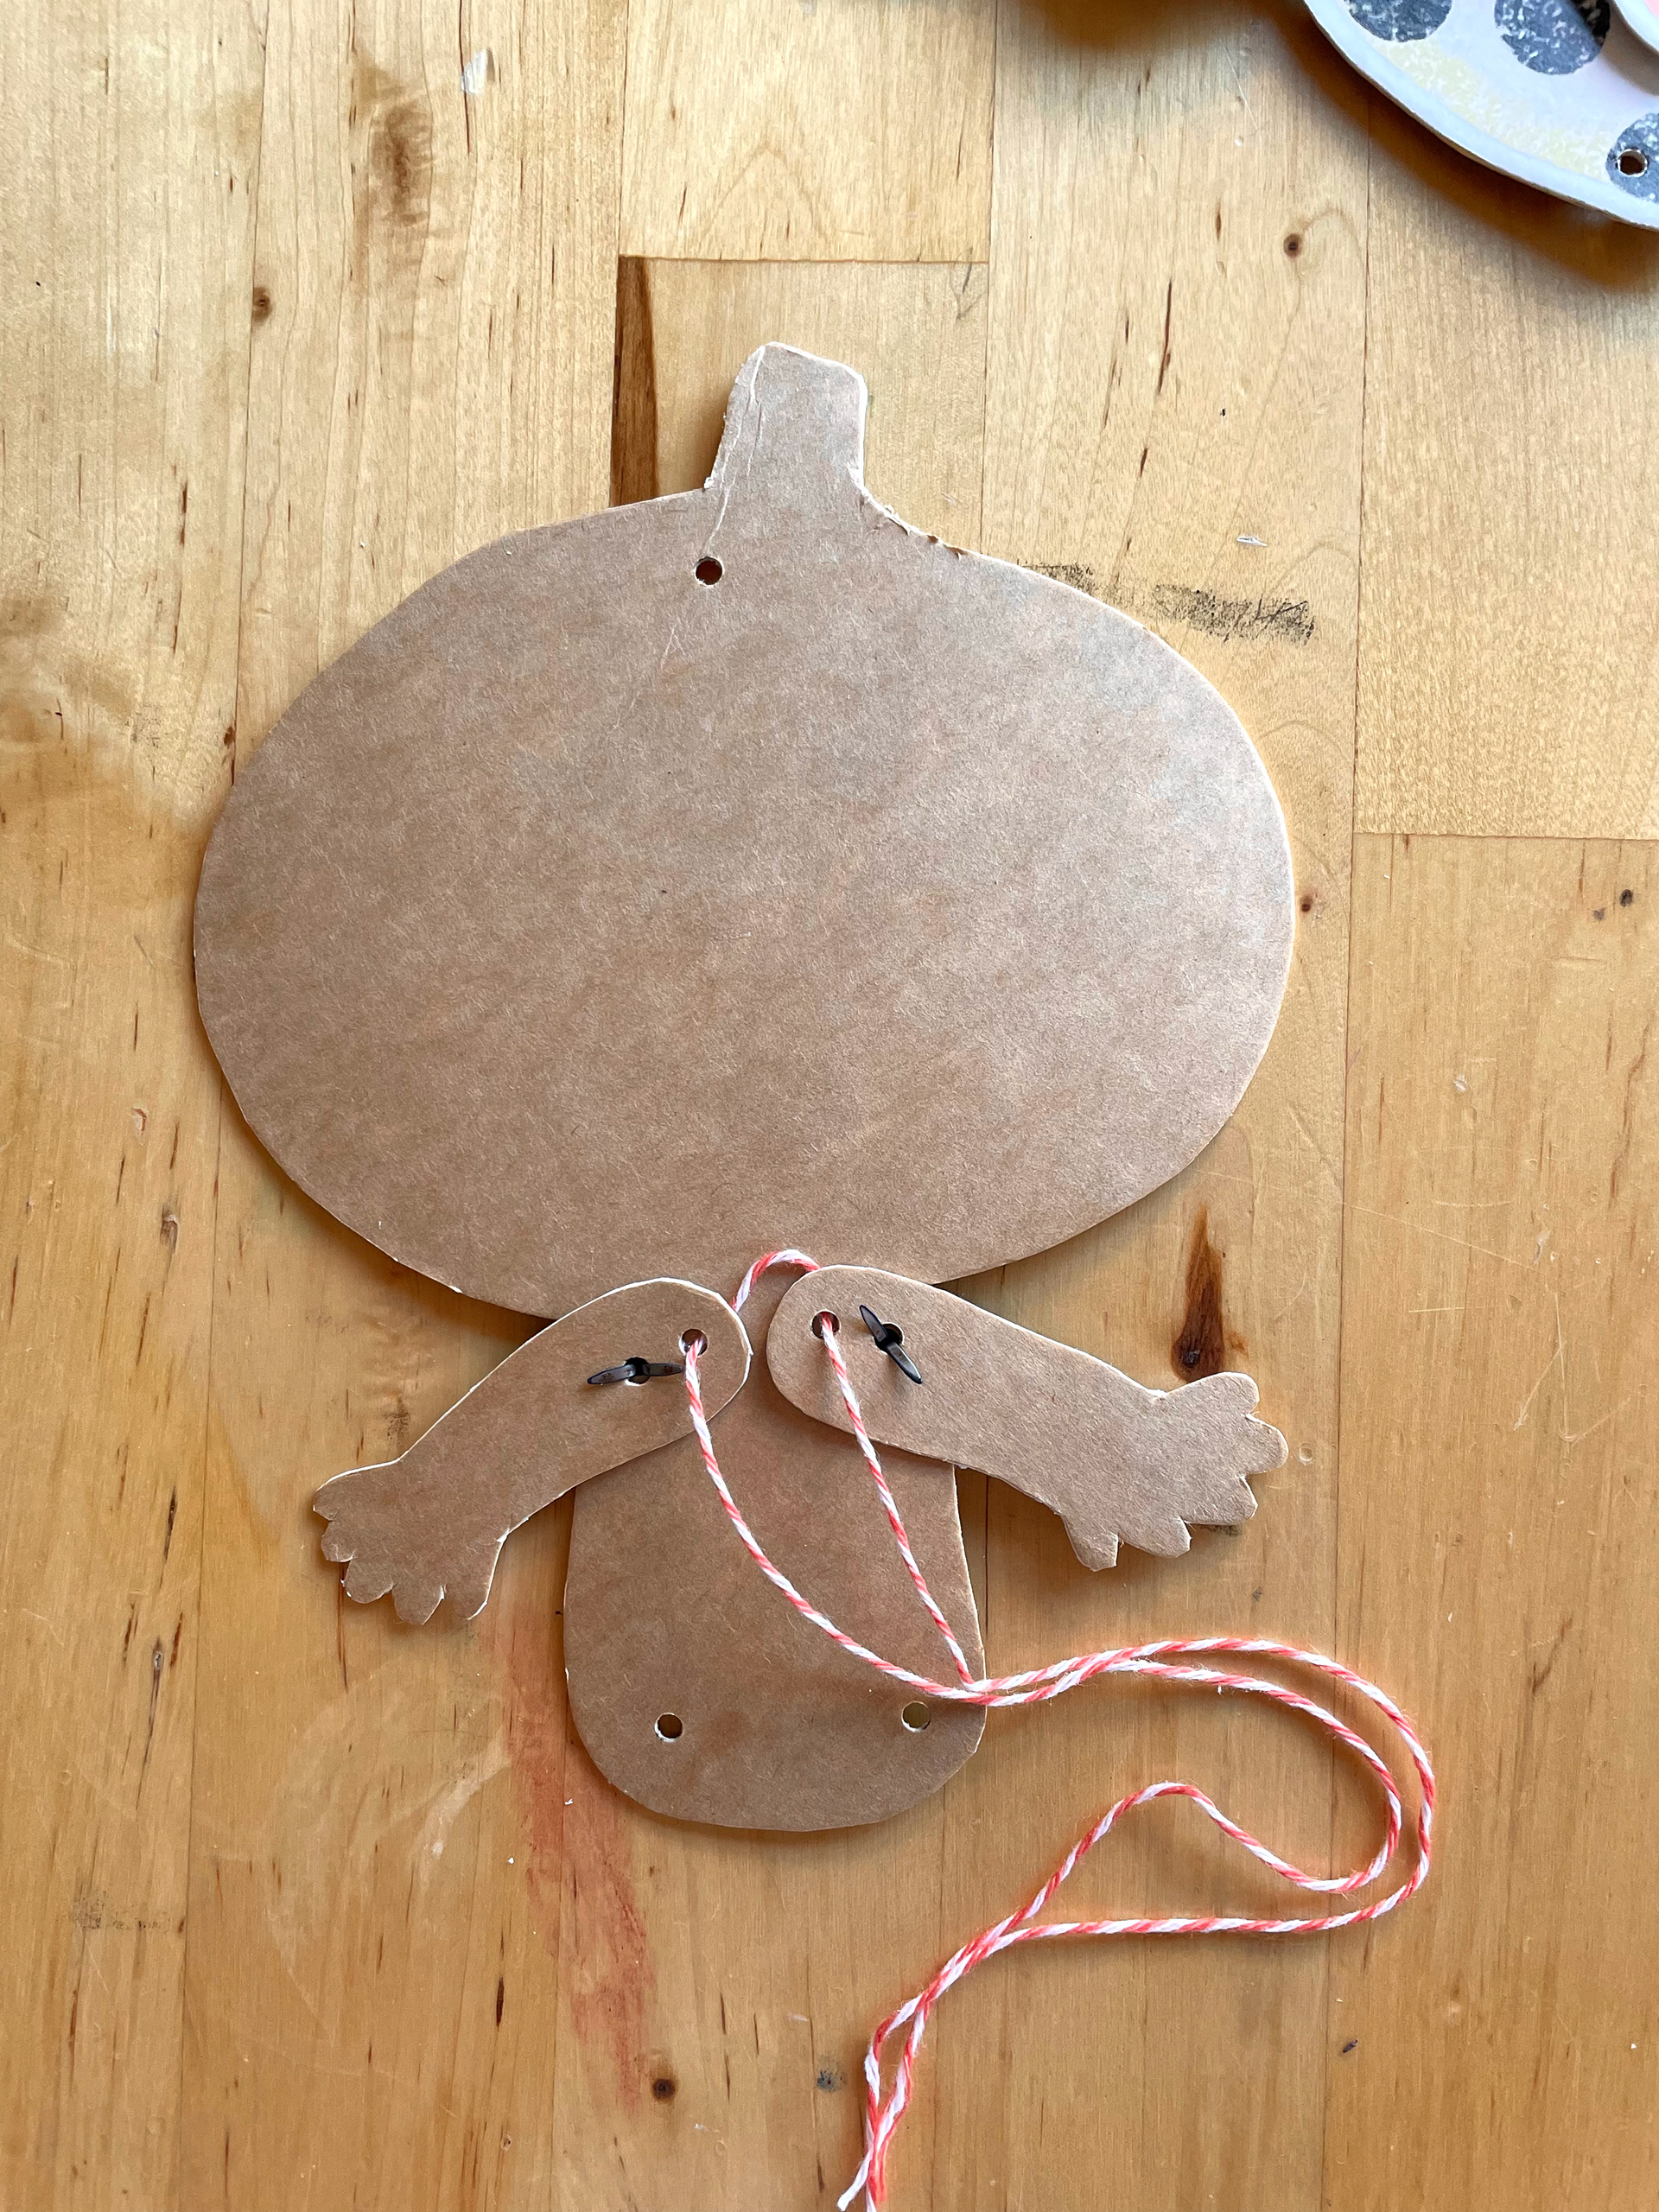
Attach arms to body with brads. Tie string ends together as shown.
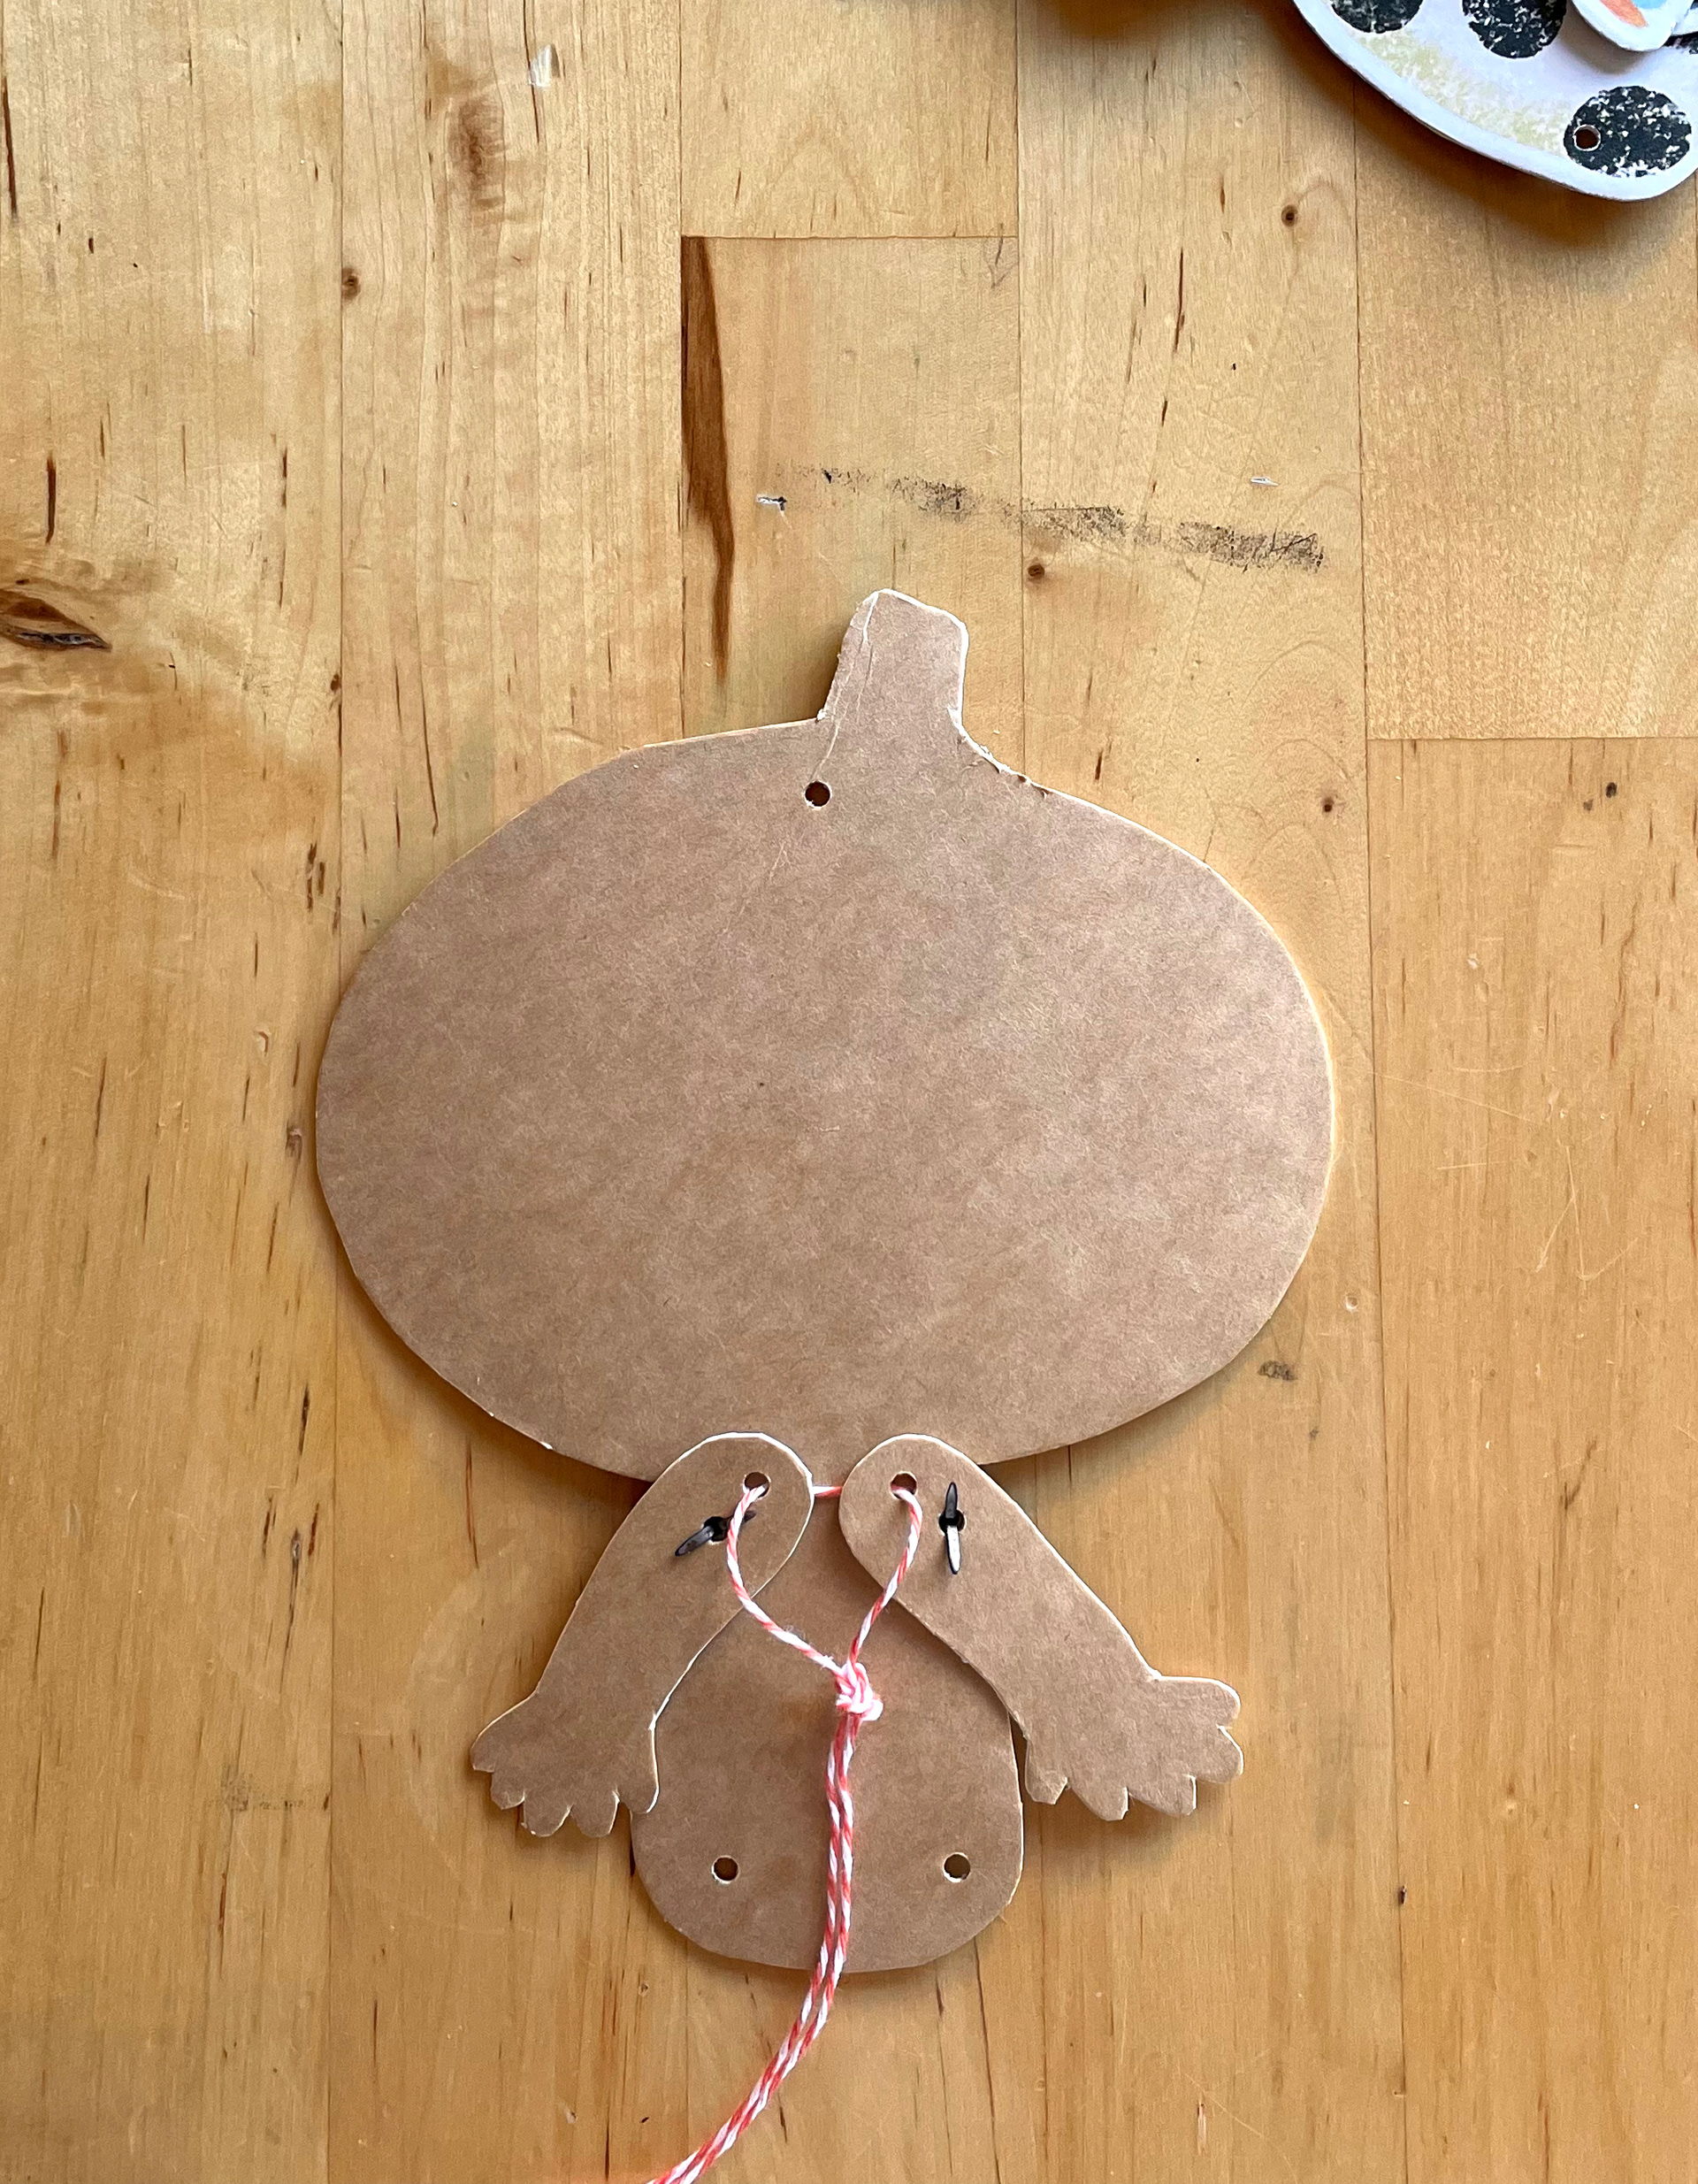
Step 6: Thread string through the legs as shown. Attach the legs to the body with the remaining 2 brads.
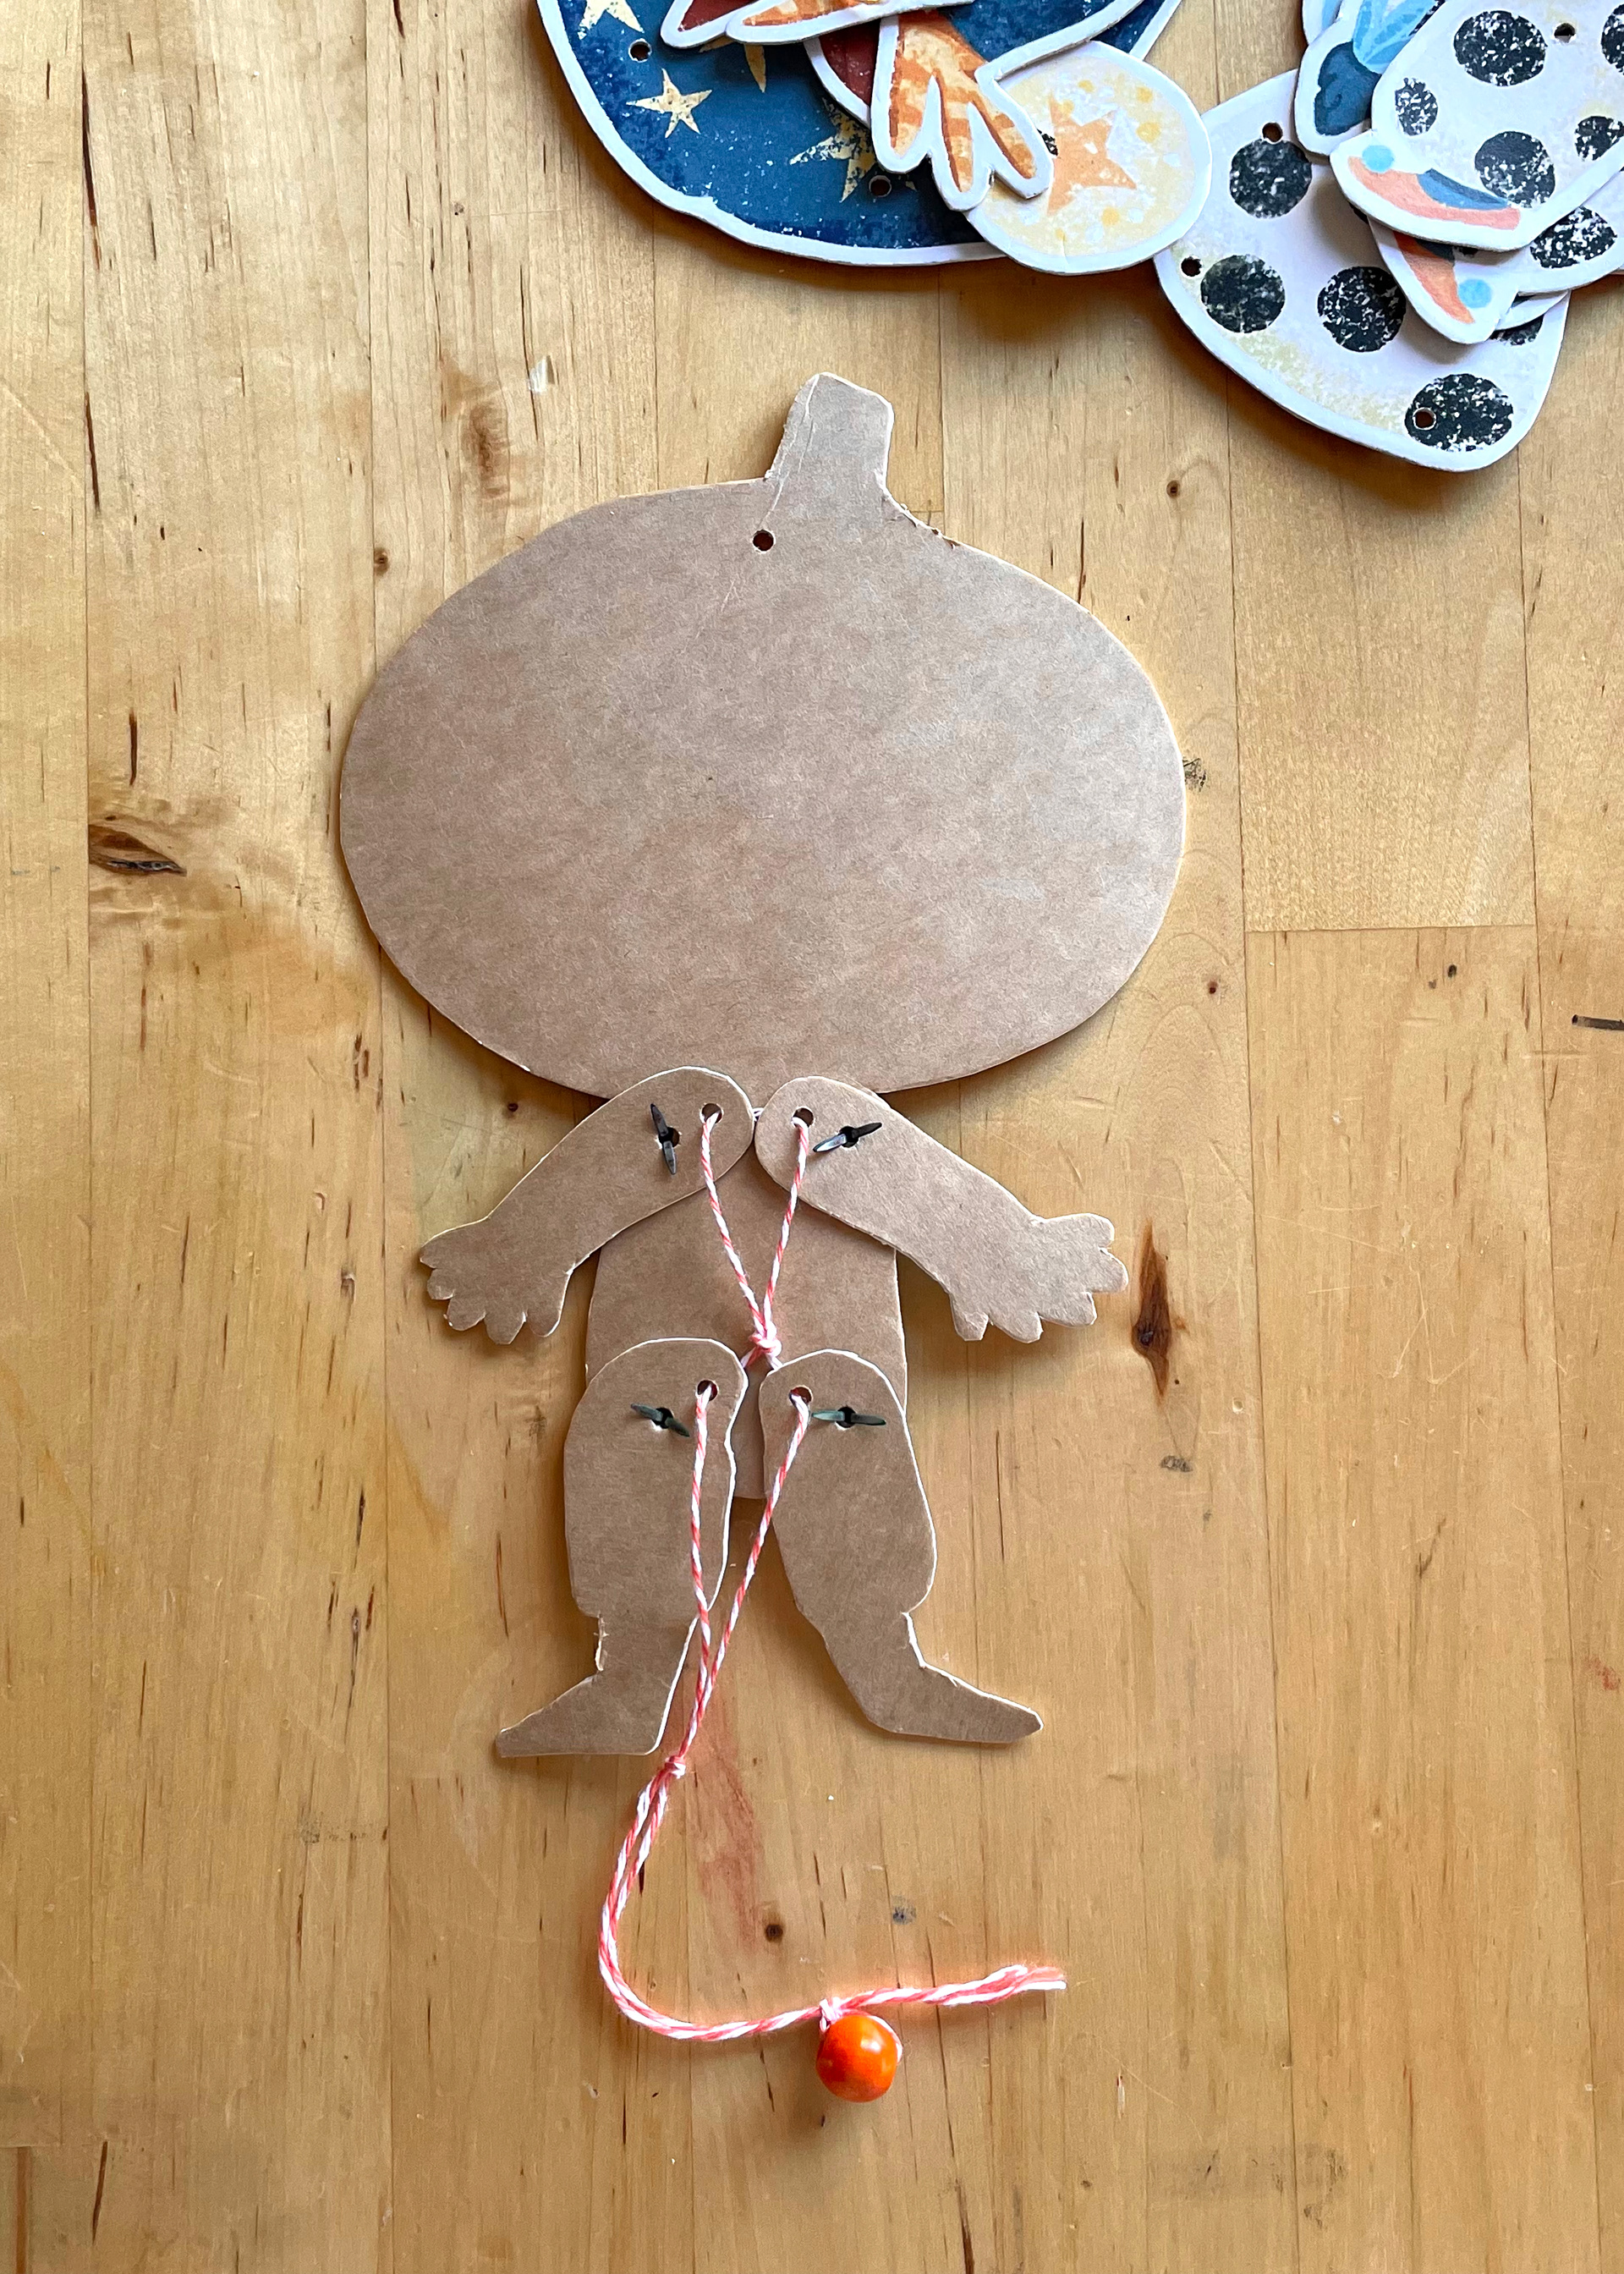
Tie string ends together.
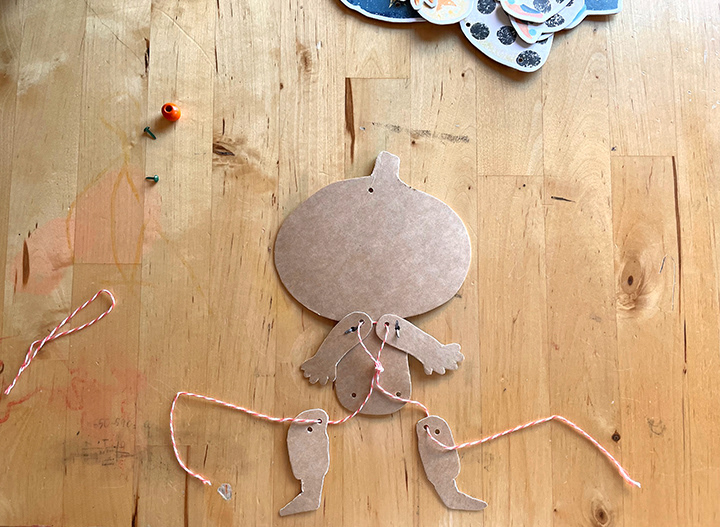
Step 7: Tie either a pull bead or a loop onto the bottom of the string as shown.
Step 8: With the 6" string, tie a short loop through the top of the head or hat.
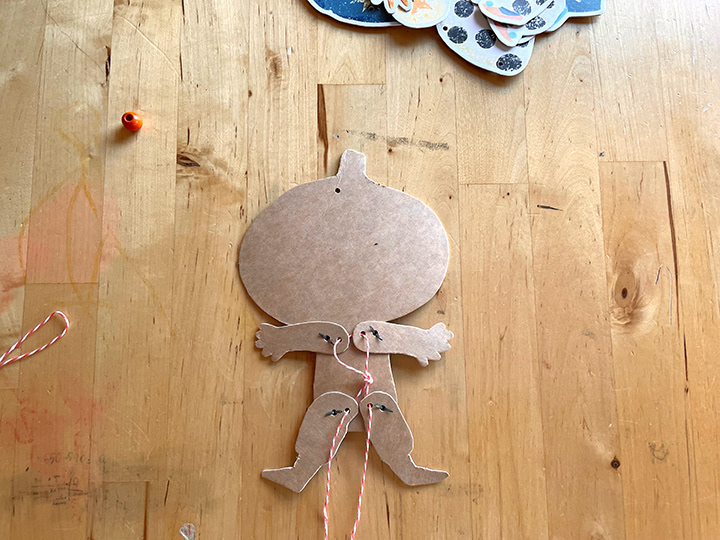
Step 9: You're done! Hold the top loop and pull bottom string to make it jump. If the arms and legs aren't moving very well, try loosening the brads. If that doesn't seem to work, you may need to retie the string looser or tighter.
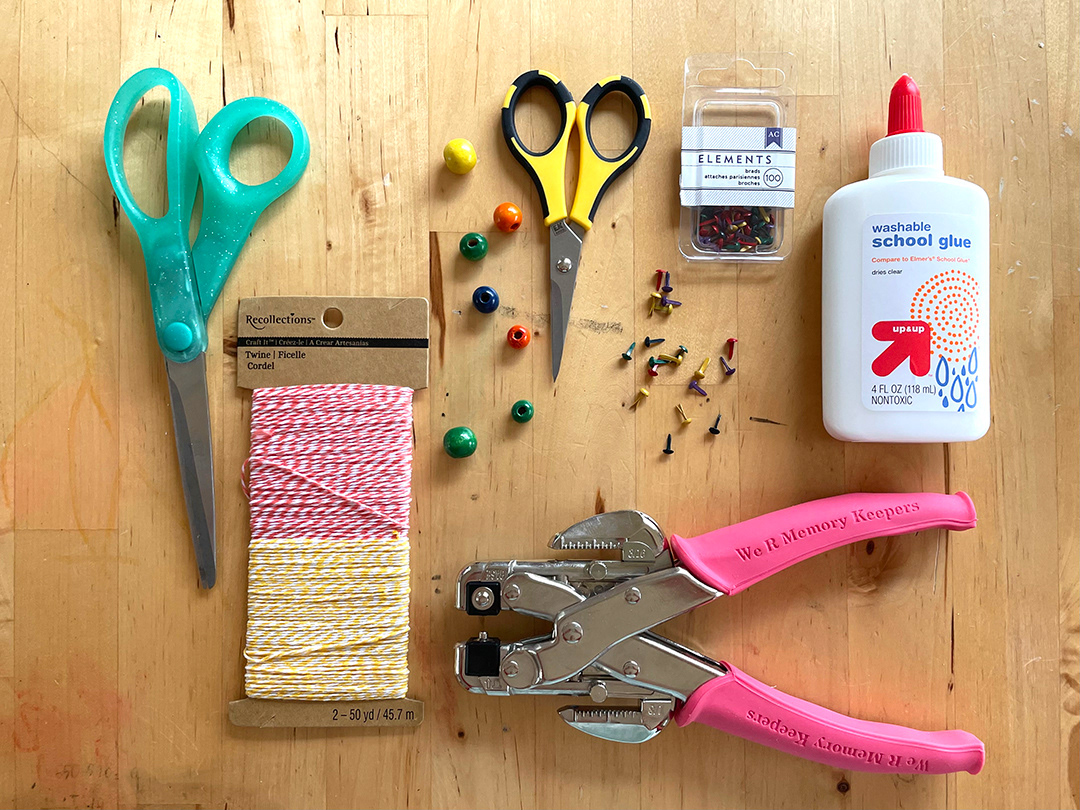
If you're curious, these are the tools and supplies that I used. From left to right: standard scissors, baker's twine, wooden beads from an assorted pack, EK Success Cutter Bee Scissors (link), 1/8" assorted brads, washable school glue, and the Crop-A-Dile We R Memory Keepers hole punch. The Cutter Bee scissors are amazing, same for the Crop-A-Dile. I've had the Crop-A-Dile one for ages and ages and it's a champ. It has two hole punch sizes and can do rivets.
I hope your jumping jacks turn out great! Happy Halloween!